
rockford fosgate wiring guide
Welcome to the Rockford Fosgate Wiring Guide, your comprehensive resource for installing audio systems. Proper wiring ensures optimal performance, safety, and sound quality. This guide covers diagrams, troubleshooting, and best practices for a flawless setup.
1.1 Importance of Proper Wiring
Proper wiring is essential for ensuring optimal performance, reliability, and safety in your Rockford Fosgate audio system. Incorrect wiring can lead to poor sound quality, distortion, or even damage to components. It prevents electrical hazards like short circuits and overheating, which can compromise your vehicle’s safety. Proper connections also maintain signal integrity, reducing interference and hum. Additionally, correct wiring ensures compatibility between components, such as amplifiers, subwoofers, and speakers, maximizing system efficiency. Always follow the recommended wiring diagrams and guidelines to achieve a flawless installation and enjoy unparalleled audio performance from your Rockford Fosgate setup.
1.2 Overview of Rockford Fosgate Amplifiers
Rockford Fosgate amplifiers are renowned for their high-performance audio solutions, designed to deliver powerful, clear, and distortion-free sound. Whether you’re upgrading your car audio system or building a custom setup, their amplifiers cater to various needs, from compact designs to high-wattage models. The Punch series is a popular choice for its balanced blend of power and sound quality, while the Power Series offers premium performance with advanced features like Class-BD amplification. These amplifiers support multiple configurations, including stereo, mono, and tri-mode, making them versatile for subwoofers, speakers, and complex audio systems. Rockford Fosgate amplifiers ensure compatibility with modern car stereos and provide reliable, long-lasting performance.

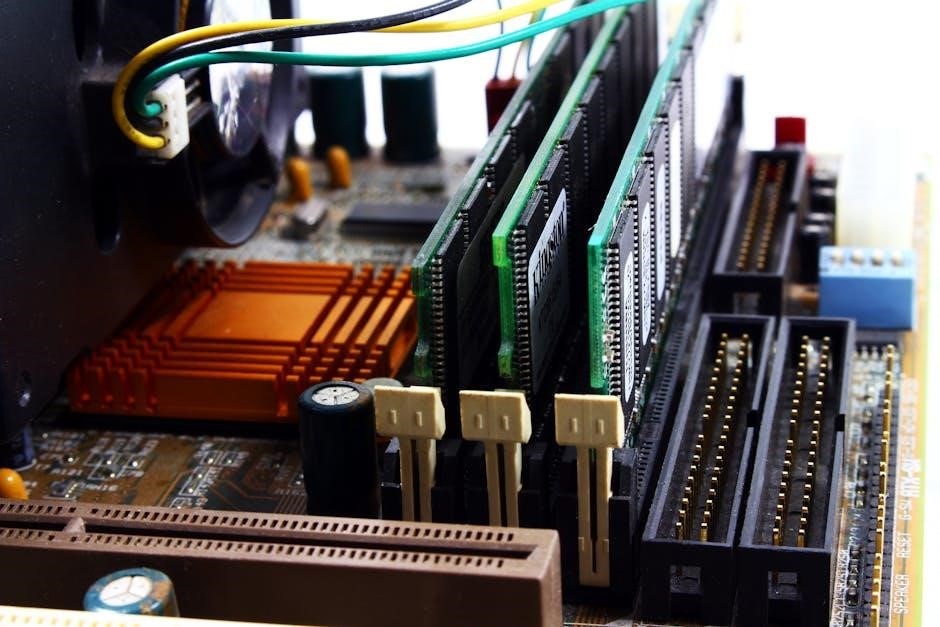
Understanding Rockford Fosgate Amplifier Components
Rockford Fosgate amplifiers feature essential components like power and ground terminals, RCA inputs, speaker terminals, and crossover controls. These parts work together to provide clean power, precise signal handling, and customizable sound output, ensuring optimal performance and reliability in any audio system.
2.1 Power and Ground Terminals
The power and ground terminals are critical for connecting your Rockford Fosgate amplifier to the vehicle’s electrical system. The power terminal requires a heavy-gauge wire directly from the battery, while the ground terminal connects to a clean, bare metal surface. Properly securing these terminals ensures stable power delivery and prevents electrical noise. Always use the recommended wire gauge to avoid voltage drop and overheating. Ensure connections are tight and free from corrosion for reliable performance. Incorrect wiring can lead to system failure or damage. Refer to the wiring diagram for specific terminal locations and recommended installation practices to guarantee safe and optimal operation of your amplifier.
2.2 RCA Inputs and Outputs
RCA (Radio Corporation of America) inputs and outputs are essential for connecting your Rockford Fosgate amplifier to a stereo system. RCA inputs receive audio signals from the head unit or processor, while outputs send signals to other amplifiers or devices. Properly connecting RCA cables ensures high-quality sound transmission. Use high-quality RCA cables to minimize noise and interference; The RCA ports on Rockford Fosgate amplifiers are clearly labeled for input and output configurations. Ensure secure connections to avoid signal loss or degradation. Improper RCA wiring can lead to hum, distortion, or no sound. Always refer to the wiring diagram for correct RCA terminal placement and configuration to achieve optimal audio performance and system integration.
2.3 Speaker Terminals and Impedance
Speaker terminals on Rockford Fosgate amplifiers are designed to connect speakers securely, ensuring proper signal flow and power delivery. Impedance, measured in ohms, is critical for matching speakers to the amplifier’s output. Mismatched impedance can lead to reduced efficiency or potential damage. Rockford Fosgate amplifiers often support multiple impedance loads, but proper configuration is essential. Use the correct gauge wire for speaker connections to maintain signal integrity. Secure connections prevent interference and ensure optimal sound quality. Always verify impedance compatibility and terminal wiring to avoid issues like distortion or power loss. Proper setup guarantees reliable performance and clear audio output from your Rockford Fosgate system.
2.4 Crossover and Gain Controls
Crossover controls on Rockford Fosgate amplifiers allow precise adjustment of frequency distribution between speakers and subwoofers. Properly setting the crossover ensures optimal sound quality by directing the right frequencies to the right components. Gain controls regulate the amplifier’s output level, preventing distortion and ensuring compatibility with your audio source. Adjusting these settings requires careful calibration to match your system’s specifications. Misalignment can lead to imbalanced audio or potential damage. Use the provided diagrams and guidelines to configure crossover points and gain levels accurately. This ensures a clean, distortion-free signal and maximizes the performance of your Rockford Fosgate amplifier and connected speakers or subwoofers.

Rockford Fosgate Wiring Diagrams
The Rockford Fosgate Wiring Diagrams provide step-by-step guidance for proper connections and system layout. Clear diagrams for 2-channel, 4-channel, and mono setups ensure optimal performance and prevent issues.
3.1 2-Channel Amplifier Wiring Diagram
A 2-channel amplifier wiring diagram simplifies connecting your stereo system. Use RCA cables for signal input and ensure proper power and ground connections. Set the crossover for optimal sound quality. Proper wiring prevents distortion and ensures safe operation. Follow the diagram for a seamless installation and enjoy high-quality audio performance.
3.2 4-Channel Amplifier Wiring Diagram
The 4-channel amplifier wiring diagram is ideal for powering multiple speakers or components. Each channel connects to a separate speaker or component, such as front and rear speakers or a subwoofer. Use RCA cables for input signals and ensure proper power and ground connections. Speaker terminals should be wired according to impedance specifications to avoid damage. For subwoofers, use bridged channels if needed. Proper wiring ensures balanced sound and prevents short circuits. Follow the diagram for a clean and efficient installation, optimizing your system’s performance and sound quality. Always verify impedance and connections before powering on the system.
3.3 Mono (Bridged) Amplifier Wiring Diagram
The Mono (Bridged) Amplifier Wiring Diagram illustrates how to bridge channels for high-power subwoofer setups. This configuration combines two channels into one, delivering increased power at a lower impedance. Connect the positive terminal of one channel to the negative of the other, ensuring proper RCA input and speaker wiring. Use a single subwoofer or wire multiple subs in parallel or series, maintaining the correct impedance load. Proper bridging prevents damage and ensures optimal bass performance. Always verify the amplifier’s specifications for compatible impedance and power ratings. This setup is ideal for dedicated subwoofer systems, delivering deep, clear bass with minimal distortion.
3.4 Tri-Mode (Stereo/Mono) Amplifier Wiring Diagram
The Tri-Mode (Stereo/Mono) Amplifier Wiring Diagram offers flexibility for diverse setups. It supports both stereo and mono configurations, allowing seamless transitions between modes. In stereo mode, connect each channel to separate speakers, while mono mode bridges channels for higher power. This diagram also covers mixed-mono setups, combining full-range and subwoofer outputs. Proper wiring ensures balanced audio and prevents overload. Use RCA inputs for signal source and adjust crossovers as needed. This versatile configuration is ideal for systems requiring both detailed highs and deep bass, ensuring optimal performance across all audio frequencies with minimal distortion and maximum efficiency.
![]()
Step-by-Step Wiring Process
Follow a systematic approach: prepare tools, mount the amplifier, connect power/ground wires, install RCA cables, link speaker wires, set crossovers, and test connections for optimal performance and safety.
4.1 Preparing the Wiring Kit
Start by unboxing and organizing your Rockford Fosgate wiring kit. Ensure all components are included: power and ground cables, RCA cables, fuse holder, connectors, and speaker wires. Verify the wire gauge matches your system’s requirements for optimal current flow. Inspect each cable for any damage or frays. Plan your routing to avoid heat sources and electrical interference. Use cable ties to keep wires neatly arranged. Double-check the compatibility of all parts with your amplifier and vehicle setup. Proper preparation ensures a smooth and efficient installation process, minimizing the risk of issues down the line.
4.2 Mounting the Amplifier
Mounting your Rockford Fosgate amplifier securely is crucial for optimal performance. Choose a flat, stable surface with adequate ventilation to prevent overheating. Ensure the location is away from direct sunlight and moisture. Use the provided mounting hardware or suitable screws to fasten the amplifier firmly. Double-check that the amplifier is level and secure to avoid vibration during operation. If installing in a vehicle, consider spaces like the trunk or under a seat. Always refer to the amplifier’s manual for specific mounting recommendations. Proper installation ensures reliability and prevents damage to the unit. Verify all connections are accessible for future adjustments. Safety and stability are key to a successful setup.
4.3 Connecting Power and Ground Wires
Connecting power and ground wires is essential for your Rockford Fosgate amplifier setup. Start by running the power wire from the battery to the amplifier, ensuring it’s the correct polarity—positive to positive and negative to ground. Install a fuse near the battery to protect against short circuits, typically within 12 inches. For the ground wire, attach it to a solid metal part of the vehicle’s chassis, ensuring the connection is clean and free of rust. Use the same gauge wire for both power and ground to maintain consistent current flow. Strip the wire ends and secure them to the amplifier terminals, possibly using ring terminals for a secure connection. Choose the correct fuse rating based on the amplifier’s current draw and test the system to ensure proper function and safety.
4.4 Installing RCA Cables
Installing RCA cables is crucial for transferring audio signals to your Rockford Fosgate amplifier. Start by connecting the RCA outputs from your head unit to the RCA inputs on the amplifier. Match the channels—front and rear—to ensure proper sound routing. Use high-quality RCA cables to minimize noise and interference. Route the cables away from power wires to prevent electromagnetic interference. Secure the connections firmly to avoid loose contacts. After installation, test the system to ensure audio signals are clear and functioning as expected. Proper RCA cable installation ensures a clean signal path, which is vital for optimal sound quality and performance.
4.5 Connecting Speaker Wires
When connecting speaker wires to your Rockford Fosgate amplifier, ensure the wires are securely attached to the appropriate terminals. Match the positive (+) and negative (-) wires to the correct speaker terminals to maintain proper polarity. Use high-quality speaker wire with the correct gauge to minimize resistance and signal loss. For systems with multiple speakers, verify the impedance load to avoid damage to the amplifier or speakers. Route the wires neatly to avoid interference and tangles. After connecting, test each speaker to ensure sound is clear and balanced. Proper speaker wire connections are essential for achieving the best sound quality and system performance.
4.6 Setting Up the Crossover
Setting up the crossover ensures your speakers receive the optimal frequency range for clear, balanced sound. Use the crossover controls to adjust high-pass and low-pass frequencies, directing the right signals to your speakers. Proper phase and slope settings prevent distortion and ensure smooth transitions between frequency bands; Match the crossover settings to your speaker system’s capabilities to avoid strain and improve performance. Incorrect settings can lead to poor sound quality or potential damage. Always refer to your amplifier’s manual for specific crossover configuration guidance tailored to your Rockford Fosgate system.
4.7 Adjusting Gain and Settings
Adjusting the gain on your Rockford Fosgate amplifier is crucial for achieving optimal sound quality. Start by setting the gain to match your speaker’s maximum power handling to avoid distortion. Use a test CD or multimeter to ensure accurate settings. Next, configure the crossover frequencies to direct high and low signals appropriately, enhancing clarity and preventing speaker strain. Check the impedance settings to ensure compatibility with your system. Finally, utilize the remote gain control for fine-tuning volume levels without altering the head unit. Proper adjustment of these settings ensures balanced audio, prevents damage, and maximizes your system’s performance.
Wiring Configurations for Specific Systems

Explore tailored wiring setups for subwoofers, multiple speakers, and high-level inputs. Detailed diagrams and instructions ensure optimal sound quality and compatibility for your unique audio system configuration.
5.1 Wiring for Subwoofers
Properly wiring your subwoofer to a Rockford Fosgate amplifier ensures deep, clear bass and optimal system performance. Use the correct impedance and wiring configuration to match your subwoofer’s specifications. For a single subwoofer, a straightforward parallel or series connection works well. When wiring multiple subs, consider series-parallel configurations to achieve the desired load. Always use high-quality, appropriately gauged wire to minimize resistance. Refer to Rockford Fosgate’s wiring diagrams for specific setups, and ensure the amplifier’s power rating aligns with the subwoofer’s requirements. Proper wiring prevents damage and ensures your system delivers the powerful, distortion-free bass you expect. Test your setup with a low-volume audio source to verify accuracy.
5.2 Wiring for Multiple Speakers
Wiring multiple speakers to a Rockford Fosgate amplifier requires careful planning to maintain optimal impedance and power distribution. Start by determining the impedance of each speaker and the amplifier’s output impedance. For two 4-ohm speakers, a parallel connection results in a 2-ohm load, while a series connection gives an 8-ohm load. Use a series-parallel configuration for four 4-ohm speakers to achieve a stable impedance. Ensure the amplifier can handle the total power required by the speakers. Use high-quality, appropriately gauged wire to minimize resistance and prevent signal loss. Consult Rockford Fosgate’s resources for specific wiring diagrams and guidelines. Secure all connections to avoid short circuits and ensure smooth system operation.
5.3 Wiring for High-Level Inputs
Wiring for high-level inputs allows you to connect your Rockford Fosgate amplifier directly to your vehicle’s factory stereo or OEM head unit. Use a high-level input adapter, such as the Rockford Fosgate RFI2SW, to convert speaker wires to RCA inputs. Connect the adapter to the speaker outputs of your head unit, then run the RCA cables to the amplifier’s high-level input terminals. Ensure the amplifier’s input sensitivity is set correctly to avoid distortion. Secure all connections to prevent noise or signal loss. Use high-quality wires and connectors for optimal performance. Refer to Rockford Fosgate’s wiring diagrams for specific configurations and guidelines.
5.4 Wiring for Bi-Amping
Bi-amping involves using separate amplifier channels for different speaker components, such as woofers and tweeters, to optimize sound quality. Rockford Fosgate amplifiers support bi-amping configurations, allowing you to connect high-frequency and low-frequency drivers independently. Use high-quality RCA cables to split the audio signal between channels. Ensure proper speaker impedance matching to avoid overload or distortion. Connect the woofer to one channel and the tweeter to another, following Rockford Fosgate’s wiring diagrams for specific configurations. Adjust crossover settings to isolate frequency ranges. Secure all connections to minimize noise interference. This setup enhances clarity and control, delivering precise audio reproduction for an immersive listening experience.

Troubleshooting Common Wiring Issues
Identify common wiring issues like no sound, distortion, or short circuits. Check connections, fuses, and impedance mismatches. Ensure proper ground and power wire installation for stable operation.
6.1 Diagnosing No Sound Issues
No sound issues can stem from power problems, loose connections, or incorrect settings. Check the amplifier’s power and ground wires for proper connection and ensure no corrosion. Verify RCA cables are securely linked and not damaged. Ensure the amplifier is turned on and volume is adjusted. If using a remote subwoofer level control, check its functionality. Inspect fuses for blown conditions and replace if necessary. Consult the wiring diagram to confirm all connections match the setup. Test each component individually to isolate the issue. If problems persist, review the user manual or contact Rockford Fosgate support for further assistance. Always ensure clean, tight connections to avoid signal loss.
6.2 Fixing Distortion Problems
Distortion issues often arise from improper gain settings, incorrect crossover configurations, or poor wiring. Start by checking RCA cables for damage or interference. Ensure the amplifier’s gain is set correctly, avoiding excessive levels that can clip the signal. Verify speaker wires are securely connected and not causing resistance issues. Check the power supply for stability and ensure the amplifier is properly grounded. If using a crossover, adjust the frequency settings to match your speakers. Consult the wiring diagram to confirm proper connections. Clean or replace corroded terminals and ensure all components are compatible. If distortion persists, refer to the user manual or contact Rockford Fosgate support for further guidance.
6.3 Identifying Short Circuits
A short circuit occurs when there’s an unintended path for electricity, often causing system failure. To identify shorts, use an Ohmmeter to measure resistance across wires. A reading of 0 ohms indicates a short. Inspect the wiring kit for frayed or exposed wires touching metal surfaces. Ensure power and ground wires are not in contact. Check RCA cables for damage or improper connections. Disconnect components one by one to isolate the issue. If the amplifier fuses blow repeatedly, a short may exist. Consult the wiring diagram to verify proper connections and ensure all terminals are secure. Addressing shorts promptly prevents damage to your Rockford Fosgate system.
6.4 Checking for Loose Connections
Loose connections are a common cause of electrical issues in car audio systems. To identify loose connections, inspect all wires, terminals, and connectors for tightness. Use a wrench or pliers to ensure terminals are securely fastened. Check power and ground wires for any signs of fraying or corrosion. Verify RCA and speaker connections are firmly plugged in. If using a wiring harness, ensure all pins are securely seated. A multimeter can help detect intermittent connections by measuring resistance. Addressing loose connections early prevents power loss, distortion, or system failure. Always refer to the wiring diagram for proper connection points and ensure all terminals are clean and free of debris.

Tips for Optimal Performance
Use high-quality wires, ensure proper fuse installation, and maintain clean signal paths. Avoid interference by routing wires away from noise sources and keep connections secure for consistent sound quality;

7.1 Choosing the Right Gauge Wire
Selecting the correct wire gauge is crucial for optimal performance. A lower gauge number indicates thicker wire, which reduces resistance and ensures sufficient power delivery. Rockford Fosgate recommends using a minimum of 20-gauge wire for speaker connections and 4-gauge or lower for power cables to the battery. Proper wire sizing prevents voltage drop and overheating, ensuring reliable operation. Always consult the amplifier’s specifications to match wire gauges appropriately. Using the right gauge wire enhances sound quality, prevents damage, and ensures long-lasting system performance.
7.2 Ensuring Proper Fuse Installation
Proper fuse installation is essential for protecting your Rockford Fosgate system. Always install an inline fuse near the battery connection to safeguard against power surges and short circuits. The fuse rating should match the amplifier’s specifications to prevent damage. A correctly installed fuse ensures safe operation and protects both the amplifier and vehicle electrical systems. Use high-quality fuses and secure all connections tightly to avoid voltage drops. Regularly inspect fuses for signs of wear or damage. A well-installed fuse provides peace of mind, ensuring reliable performance and preventing potential hazards.
7.3 Maintaining Clean Signal Path
Maintaining a clean signal path is crucial for optimal audio performance. Use high-quality RCA cables and ensure all connections are secure to minimize interference. Avoid routing signal cables near power wires, as this can introduce noise. Regularly inspect RCA connectors for corrosion or damage and clean them as needed. Proper shielding of cables enhances signal integrity, ensuring clear and distortion-free sound. Additionally, keep the amplifier’s gain settings balanced to prevent clipping, which can degrade sound quality. A clean signal path guarantees your Rockford Fosgate system delivers the best possible audio experience.

7;4 Avoiding Interference
To ensure crystal-clear audio, it’s essential to minimize interference in your Rockford Fosgate system. Use shielded RCA cables to reduce electromagnetic interference from power wires. Route signal cables away from alternators, motors, and other noise sources. Install noise filters or ferrite cores on power wires if necessary. Grounding your system properly is also critical to prevent hums or buzzes. Regularly inspect cables for damage and replace them if needed. By following these steps, you’ll enjoy a clean, distortion-free audio experience tailored to your car’s unique setup.
Proper wiring is crucial for optimal performance and safety in your Rockford Fosgate system. Follow the guide to ensure a clean setup, avoiding interference and potential hazards. Happy listening!
8.1 Summary of Best Practices
To ensure optimal performance and safety, follow these best practices: always use the correct gauge wire for power and ground connections, secure all terminals tightly, and avoid routing wires near heat sources. Properly set the crossover and gain controls to match your speaker impedance, preventing distortion. Regularly inspect wiring for frayed cables or loose connections. Use high-quality RCA cables to maintain a clean signal path. Keep the amplifier in a well-ventilated area to prevent overheating. Finally, refer to Rockford Fosgate wiring diagrams for specific configurations to achieve the best sound quality and system reliability.
8.2 Final Checks Before Operation
Before powering up your system, perform a thorough inspection. Ensure all connections are secure, with no loose wires or frayed cables. Verify that the amplifier is properly mounted and ventilated. Double-check the RCA, power, and ground wires for correct routing and connections. Test each channel to confirm signal flow and proper impedance matching. Ensure the crossover settings align with your speaker configuration. Turn the system on at a low volume to check for distortion or unusual noise. Review the wiring diagram to confirm accuracy. Finally, ensure all fuses are installed and easily accessible for emergency situations. A meticulous final check ensures reliable performance and longevity.